What is Qnurex Financial Assistant?
The primary objective of the Qnurex Financial Assistant is to assist small businesses in effectively managing their finances. This app is built upon the powerful foundation of Microsoft Dynamics 365 Power App. Users who are already well-versed in the functionality of Microsoft Dynamics 365 will find this app intuitive and user-friendly. By utilizing the Qnurex Financial Assistant , small businesses can overcome the challenges associated with tracking their finances.
Qnurex Financial Assistant provides the ability to:
-
Gaine insights from the payment transactions,
-
Store the data of payment transactions for a long time.
-
Look at the business from a different perspective.
License
The Qnurex Financial Wizard is available free of charge.
Prerequisite
You need a Microsoft Dynamics 365 environment.
Installation
Import the Qnurex Financial Wizard app solution on your Microsoft Dynamics 365 environment – standard procedure in Microsoft Dynamics 365.
Qnurex Financial Wizard is available on Microsoft AppSource:

Deploy Financial Wizard
Financial Assistant consists of financial assistant and collective invoice entities. To import payment transactions, do the following:
-
Create your bank account
-
Create your posting categories
-
Create your payment parties
-
Import your payment transactions, for example, as a CSV file
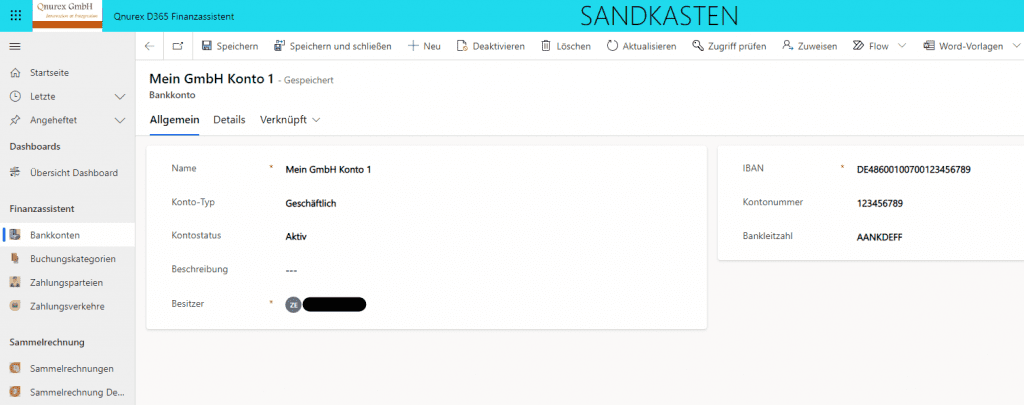
Create bank account
A bank account contains your bank account data (IBAN, account number, bank code etc.). A bank account is created once in the app. Enter data and then click on “Save and close”.
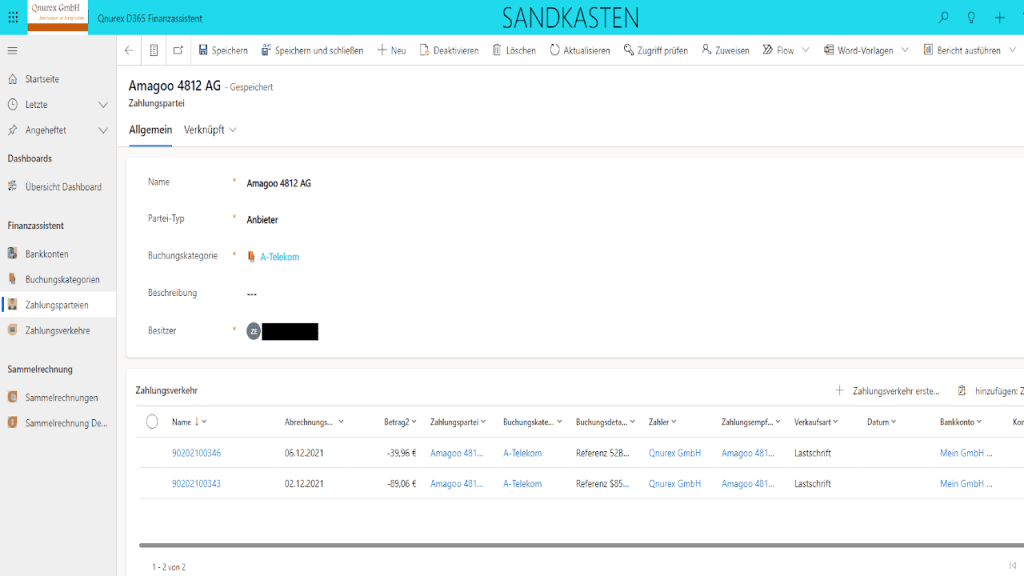
Create payment party
A payment party can be a payer or a payee. A payment party includes:
- Name
- Party type: customer, supplier, partner, etc.
- Posting category
- Description
Import payment transactions
Payment transactions consist of your exported payment transaction records from your bank account at your financial institution.
In this scenario, a CSV file is imported. The CSV file import goes in 4 steps as follows:
- Select file
- Define delimiter settings
- Assign fields
- then “Import the data
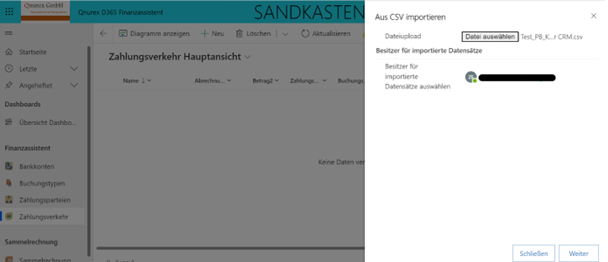
For example, go to the main view, in the menu click “Import from CSV”. Then select the CSV file, at last click Next.
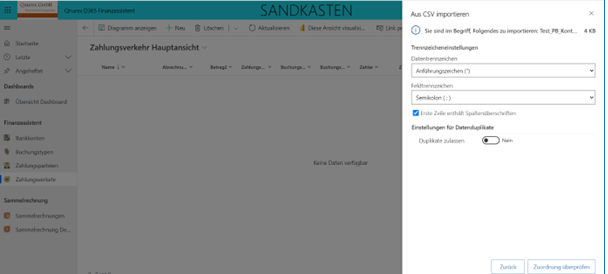
Define separator settings, for example, whether the fields separator in the CSV file is a comma or a semicolon. Then we click on “Check mapping”.
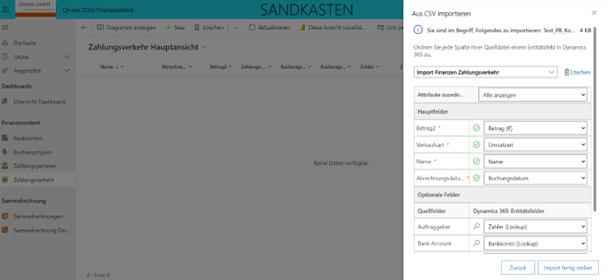
Assign fields
In this step, you will map the entity’s fields to the CSV fields. Then click on “Finish import”. It is important after that to check the import log to make sure all records are imported successfully. The records will now be visible in the payment entity.
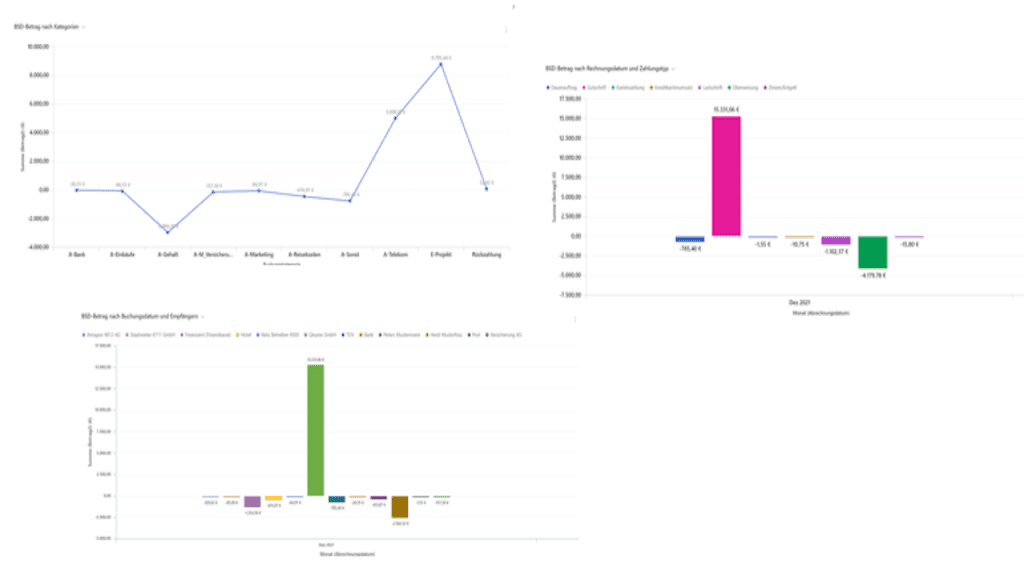
Once you have successfully imported the payment data into the payment entity, you can then keep track of your finances and apply the charts.
Note: Please note that the associated bank account and payment parties have already been created in the app before you import your payment transactions data.
Collective Invoice
The Collective Invoice recombines multiple outgoing invoice header data.
Collective invoice includes:
- Name
- Service from (date)
- Service to (date)
- Description
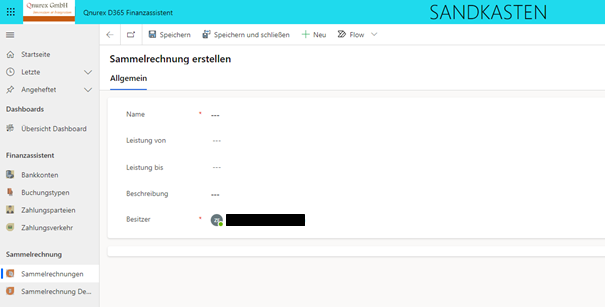
A collective invoice includes the collective invoice details.
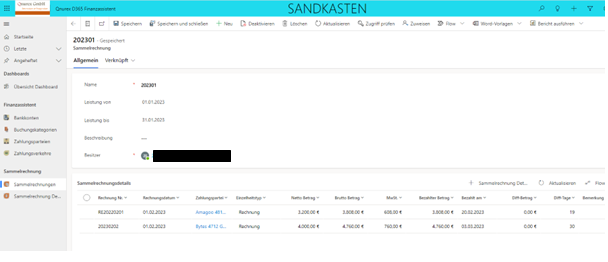
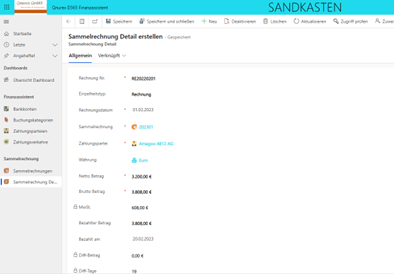
Collective Invoice Details
Collective invoice details includes:
- Invoice number
- Detail type (invoice/credit note)
- Invoice date
- Collective invoice
- Payment party
- Currency
- Net amount
- Gross amount
- VAT (read-only)
- Amount paid
- Paid on (date)
- Diff amount (read-only): Difference between amount paid and gross amount
- Diff Days (read-only): Difference between Invoice Date and Paid On
- Comment
