Press Release – Microsoft and Qnurex

“Microsoft Marketplace helps organizations and partners move faster, work smarter, and grow by connecting them with the right solutions—all in one trusted place,” said Cyril Belikoff, vice president, Microsoft Azure Product Marketing. “We’re happy to welcome Qnurex HR and PM Lite for Microsoft Dynamics 365 to the growing Microsoft Marketplace ecosystem.”
Description
The Qnurex D365 HR and PM app is a time tracking, project and employee management solution based on Microsoft Dynamics 365 Power App. Users already familiar with Microsoft Dynamics 365 functionality will also find this app easy to use.
The main goals of the app are:
- IT time tracking of employees,
- Documenting IT projects and creating reports
- Define milestones for IT projects
- Capturing employees and their experience
- Create work performance data from employees
The app consists of three categories:
- Human Resources: This is where employee data, such as documents, experience, and qualifications, is recorded.
- Project management: This is where the projects are recorded.
- Time tracking: This is where timesheets, timesheet details and work performance are recorded.
Installation
The app can be installed directly on Dynamics 365 in the cloud – standard procedure in Microsoft Dynamics 36.
The Qnurex HR and PM app is available on Microsoft Marketplace .
Human Resources
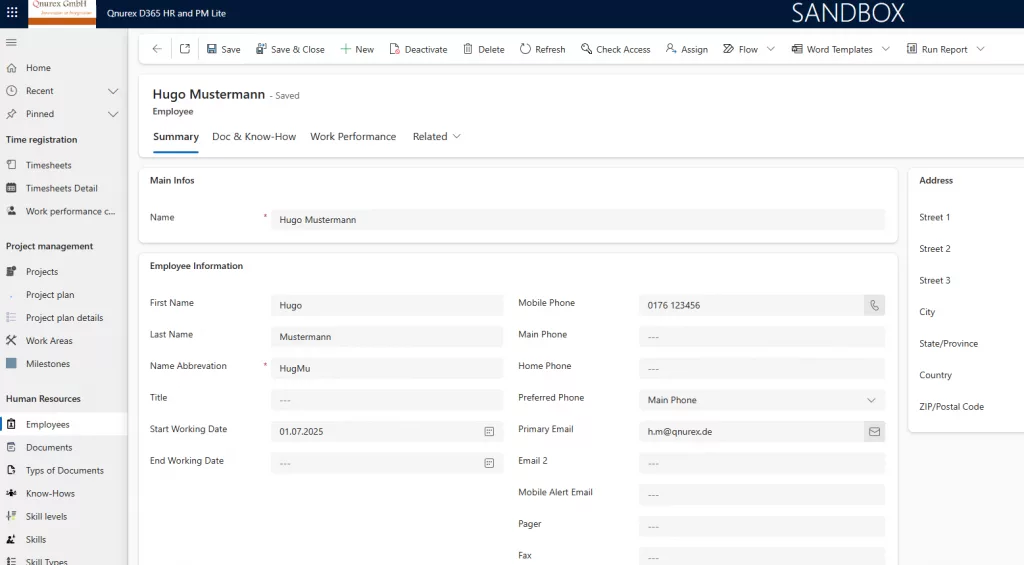
In this section, as project manager, you record your employees’ data and skills. For each employee, their personal data, documents, and experience can be recorded.
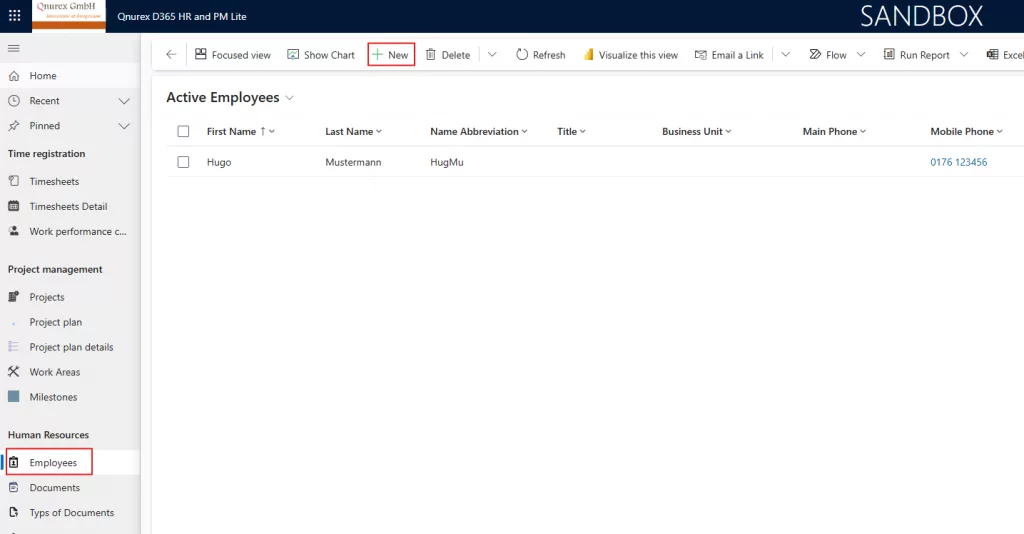
Create employee record
In the left-hand menu, go to Employees and click on “+ Create New” in the top menu. The following image shows an example:
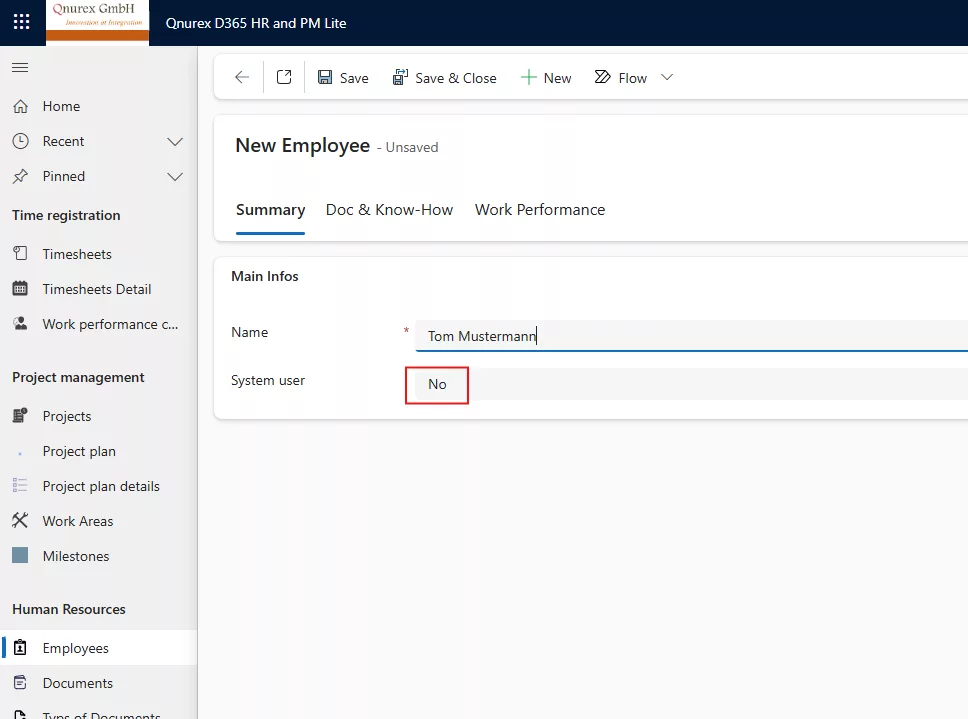
If the employee is not a Dynamics 365 system user, set the System User field to “No” and click “Save” – see the following illustration:
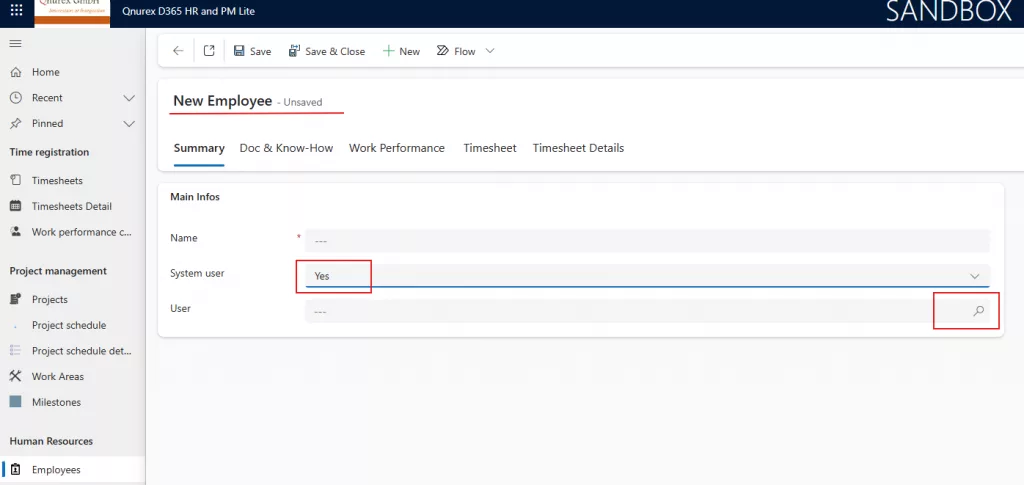
If your employee is a Dynamics 365 user, set the System User field to “Yes,” select the system user, and click “Save.” The app will then use the personal data from the selected system user. The following images show an example:
Project management
his chapter explains how to manage an IT project in Qnurex HR and PM. An IT project is organized through project plans and project plan details. An IT project consists of:
- project
- Project schedule and
- Project schedule details
A project can contain multiple project plans. A project plan itself can contain multiple project plan details.
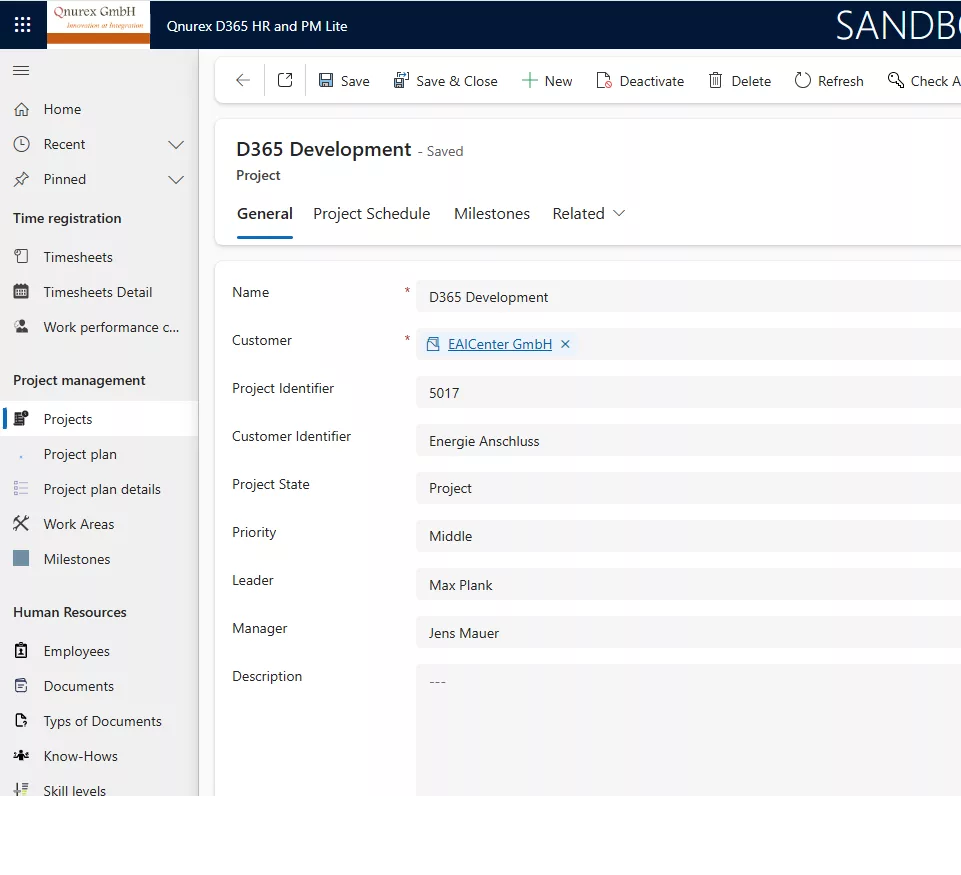
Create project
Click on “Projects” in the left-hand menu, and then on “+ Create New” in the top menu. A project is created by a user with a manager role.

Enter the project data. Finally, click “Save”. The following image shows an example:
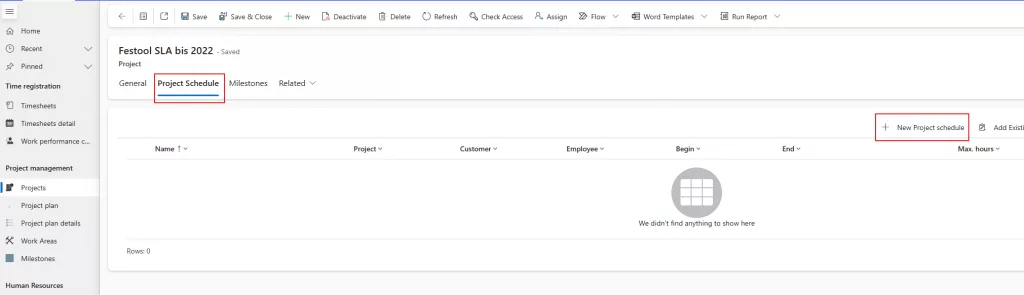
Create project schedule
A project schedule is used to define the maximum working hours each employee is expected to work within a defined timeframe. Afterwards, you can create the project schedule details. Employees can then assign their working hours to this plan. As a project manager, select the project. Click on the “Project Plans” tab and then on “+ Create Project Plan”:
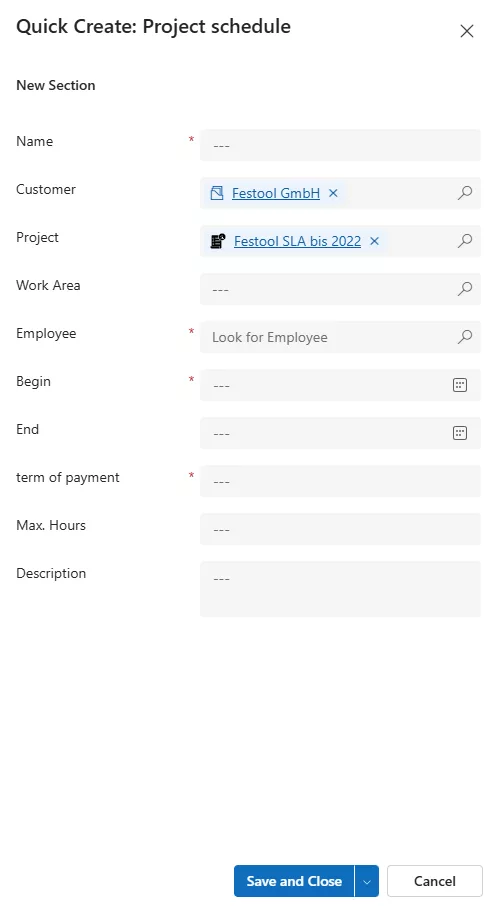
Enter the data into the project plan form. Then click “Save and close”. Example:
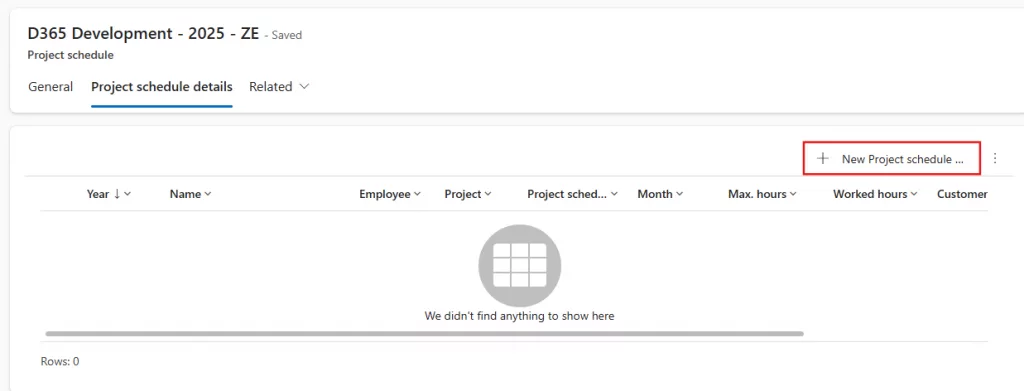
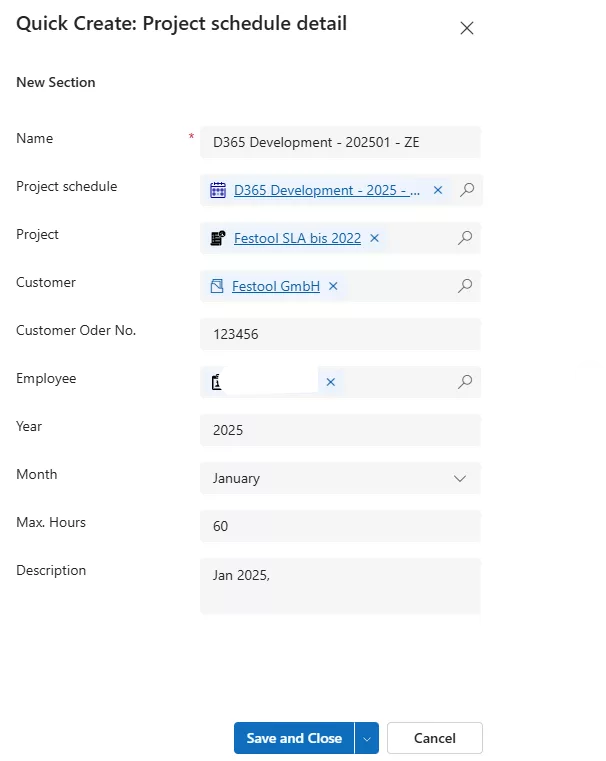
Project schedule details
The project plan details allow employees to allocate their working hours to them. Open a project plan. Then click on the “Project Plan Details” tab. Click on “+ Create Project schedule details” to create project schedule details.
Enter the data. Then click “Save and close”. The following image shows an example:
Time recording
Time tracking consists of:
- Timesheet
- Timesheet details
- Work performance
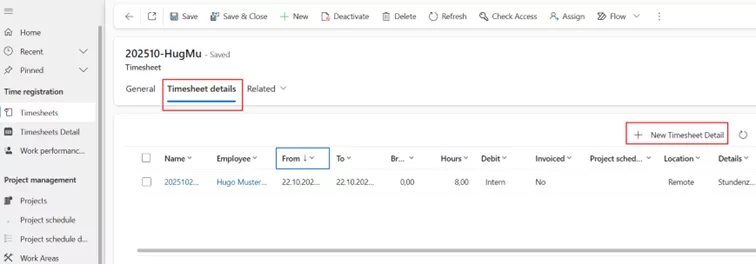
One timesheet should be issued per employee per month. The employee records their working hours on it. A timesheet can consist of several timesheet details.
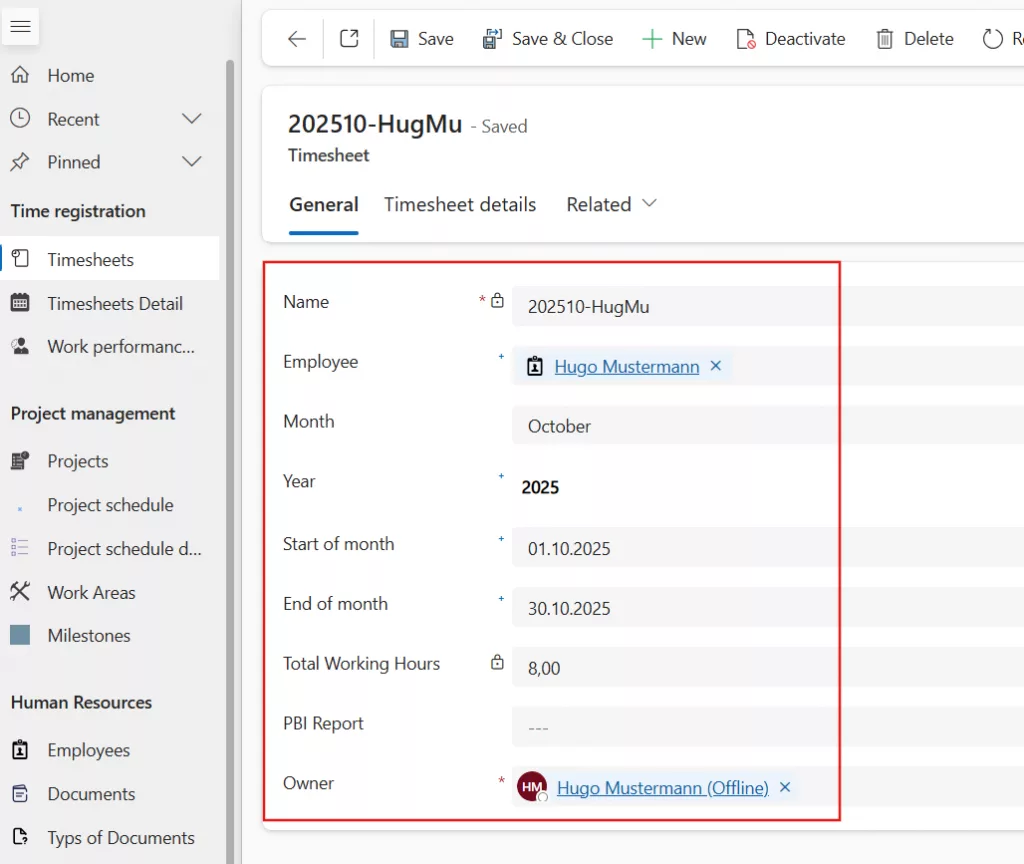
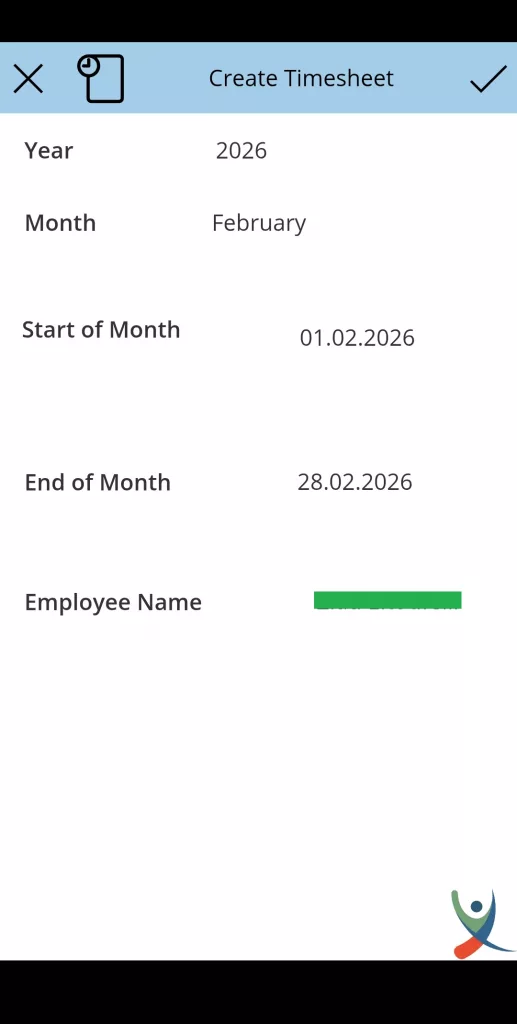
Timesheet
The project manager creates a timesheet for employee “Hugo Mustermann” for April 2025 – see the following image:
Timesheet details
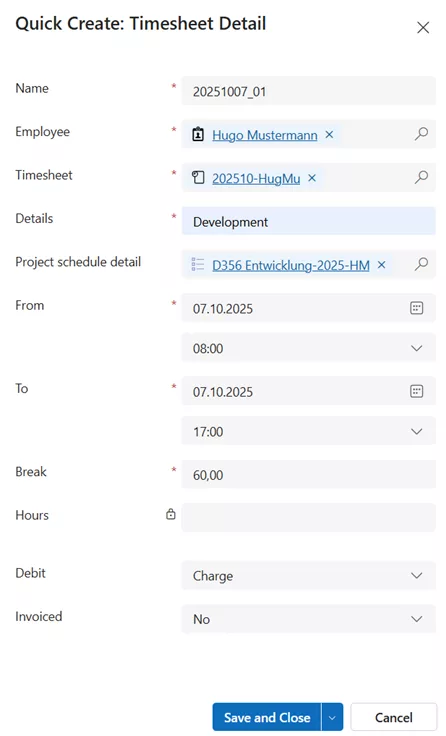
A timesheet detail is used to record an employee’s working hours. Employees can record their hours on their mobile device using the Qnurex Time Tracking Power Apps app, or on their laptop via the standard Dynamics 365 interface.
This section describes the method using the standard Dynamics 365 interface. Open a timesheet. Click on the “Timesheet Details” tab and then on the “+ Create Timesheet Detail” button.
Add the data. Then click “Save and close”. The following image shows an example:
Time tracking on mobile device
Working hours can also be recorded on a mobile device. Open the “Qnurex Time Tracking” app on your mobile device. Click on the timesheet in the timesheet list.
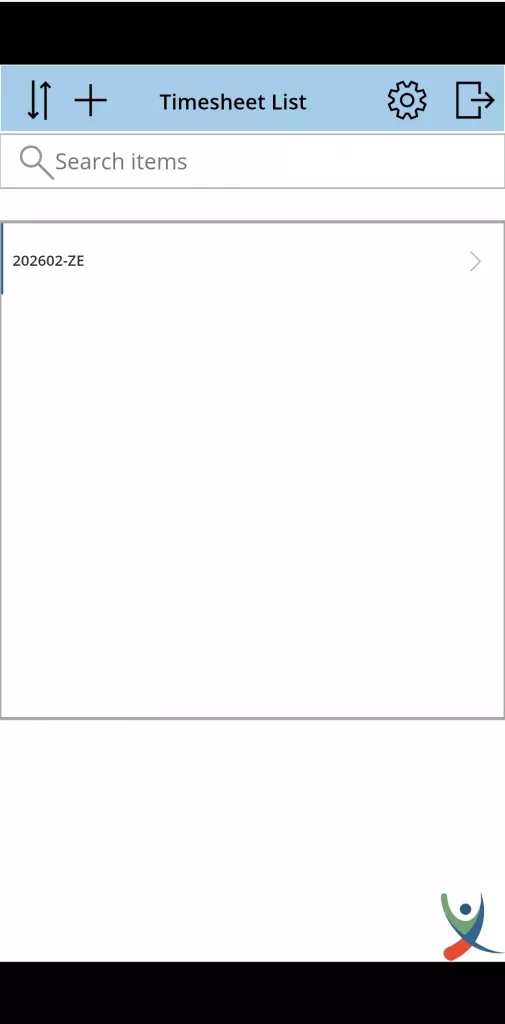
The time entries from the timesheet are displayed – if available. Click the “+” button. Add Data and then click on the “Right“ symbol to save the times:

Microsoft Marketplace
The app is published on the Microsoft Marketplace. It can be accessed at the link here.
Contact us
We are glad to help you. Contact us if you have any questions or need assistance.